Showing posts with label My Materials and Process. Show all posts

Sunday, October 20, 2013

Watercolor studies of Fall Flowers


 I love to garden, so I've been playing around with ways to paint flowers. Here are a few of my studies. This amazing October weather has been calling me, so I began by going outside and painting from my garden. Feverfew on the right, don't know the name on the left, but I couldn't manage to catch the periwinkle violet and burnt cranberry.


Went inside and added a layer of texture
I did another study, using resist first to keep whites, reds and yellows strong.
Trying to use a wet on wet style to give a feeling of flowers and grass


Another study, trying to combine what I'd learned.

More work to come!

Thursday, March 7, 2013

How to Stretch Watercolor Paper

As an illustrator using traditional watercolor techniques, I usually stretch my paper.
Here is a step-by-step tutorial for stretching watercolor paper, and the reasoning behind why I do it.


What is stretching?

Stretching means that you soak your paper and secure the edges so that the paper dries flat and taut, almost like a drum head.

Why stretch watercolor paper?

There are several reasons, but first and foremost is to keep the paper flat. When you wet paper, the fibers expand and the paper warps. The wetter you work, the more your paper will buckle. It's pretty hard to control your paint when it's cascading into a valley.

Even if you stretch your paper, you will have some warping as you work, but the paper will dry flat.

How do you stretch watercolor paper?

I was taught to stretch paper with Masonite and butcher tape, which always ended up as an exercise in frustration for me. (clunky boards and tape that didn't stick) Many years ago, I read an article in HOW magazine that recommended using cardboard and a stapler instead. I've happily followed that technique ever since.

Materials needed:
  • Decent watercolor paper. I use 140 lb. Arches, brilliant white. Fabriano, Strathmore, and Winsor-Newton make good papers, too.
  •  90 lb. paper is too flimsy for serious watercolor work. 
  • 300 lb. paper doesn't require stretching, but it is expensive, and you can't see through it to trace up a sketch, which is a problem for me.  
  • Cardboard. This is tricky. I got some triple corrugated cardboard years ago from Charette, cut it into various dimensions, and it has lasted for twenty years. Sadly, it's now unavailable. Try to find cardboard that's good and sturdy,  and larger than the paper you want to stretch. Chipboard is NOT sturdy enough. Corrugated is good, with no folds. If you have trouble with the cardboard buckling, you can staple two boards together.
  • Stapler.  I use a Staples stapler. Any stapler that you can open flat will work. I don't need an electric stapler.

This is my technique:


I begin by tracing my sketch to the paper before I stretch it. I use a pencil and light-table.

1. Soak the paper.
You can do this in a sink, a bathtub, or a large container. I often softly fold my paper in half so I can use the sink. Whatever vessel you use, make sure it's clean! Watercolor paper is treated with something called sizing. It's purpose is to keep the paper from absorbing too much. You don't want to soak out the sizing, so use cold water, and let the paper soak for a couple of minutes... not more than five.
2. Remove excess water. Pick up the paper by a corner and let it drip, then lay it flat on your board and lightly blot it with a towel.

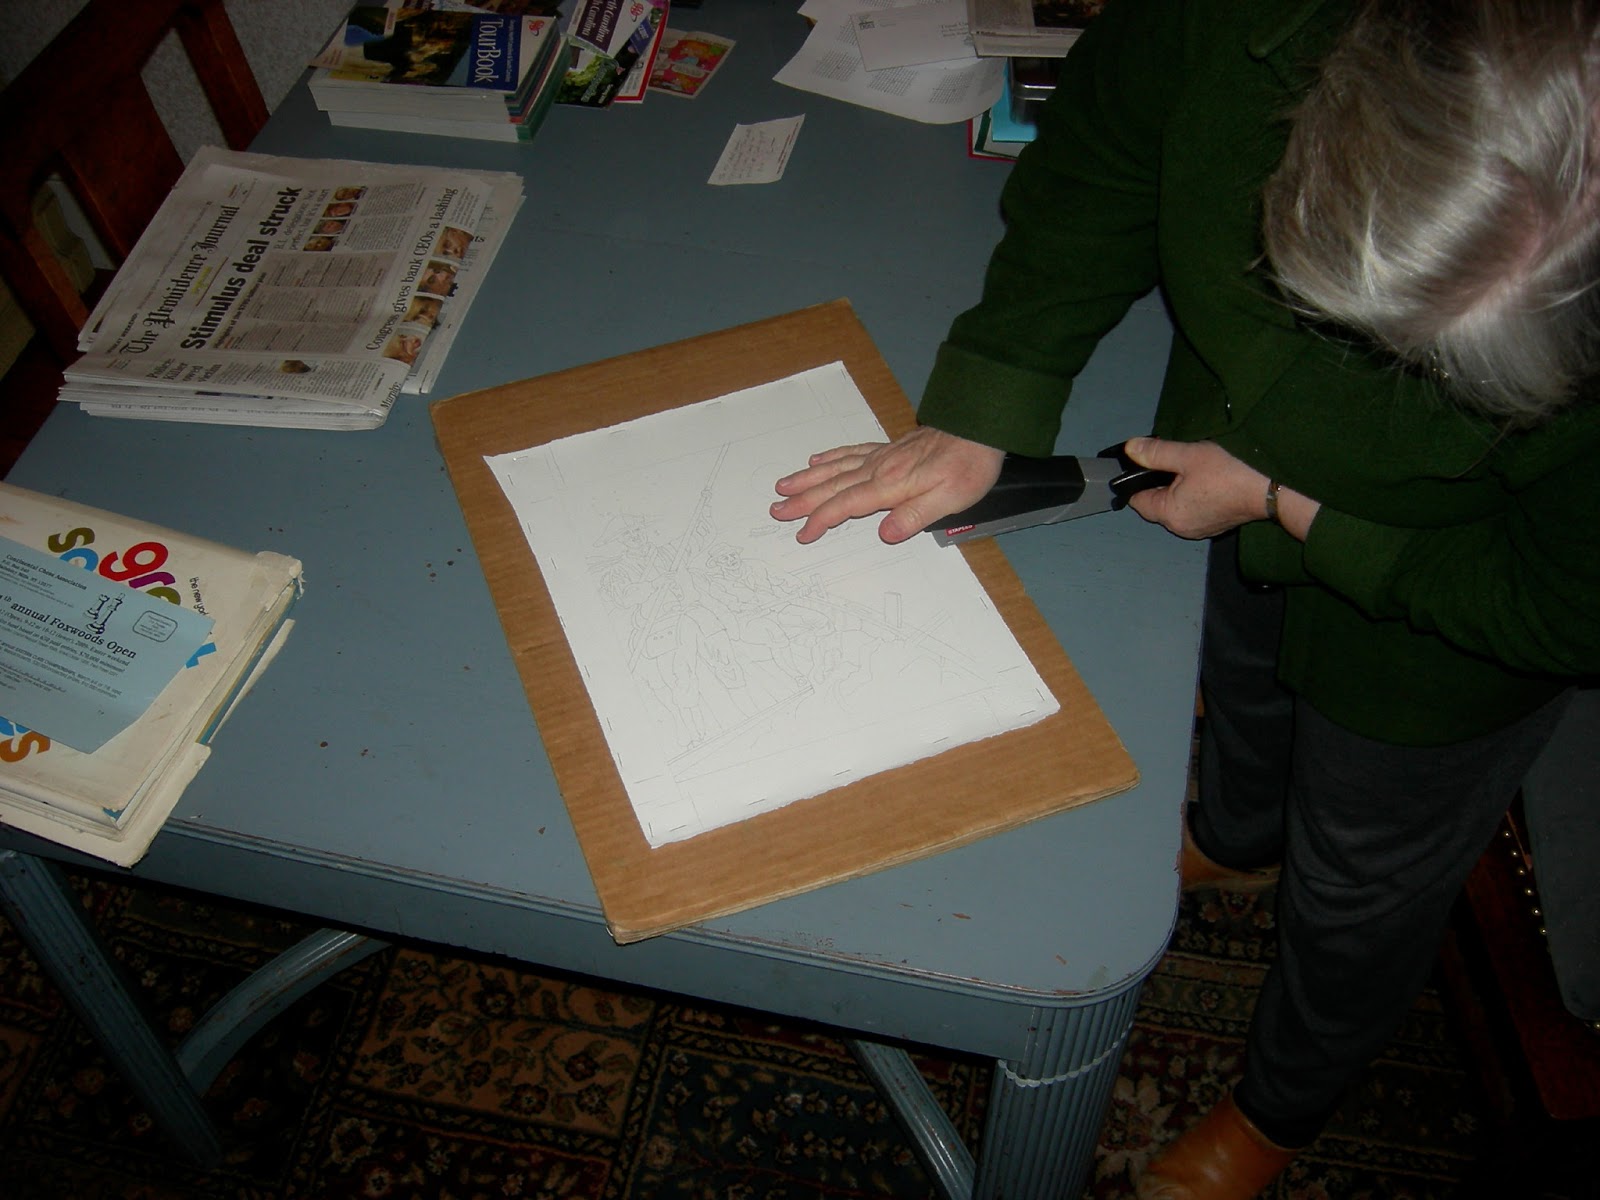
3. Staple the paper to the cardboard.
I use a regular office stapler that opens flat. Begin with one staple at the center of each side, to make sure you have your paper flat. Then staple about every 2 inches.


4. Leave the board flat until the paper is dry (unless you plan to work wet.) This takes several hours. I usually try to plan ahead so I can leave it overnight. If the paper feels cold to the touch, it's probably still wet, but you can check a corner to see if it's dry enough not to bleed.

Alternatives to stretching.

I find that soaking the paper makes it nicely receptive to washes. However, if you are not using wet washes over broad areas, you may not need to stretch good quality 140 lb. paper at all.
You can also just staple or tape the paper to a board without soaking it, and that will keep the paper relatively flat.
You can use 300 lb paper. No stretching required.
Some illustrators "paint" the back side of you paper with water, then staple it down to a board. That way they can start working right away.

Thursday, March 15, 2012

Illustration Friday # 17: YIELD

© Illustration by Cheryl Kirk Noll
Once again, I've been remiss in my attempts to get a new piece out for Illustration Friday, so here is another older piece for the word YIELD.

This was an illustration for a story about a woman homesteader in the 1920's. Among the mountainload of problems that homesteaders faced was the dreaded "plague of locusts" (the swarming phase of grasshoppers), which could strip a farmer's summer yield in minutes. What a heartbreak that must have been.

This piece was one of the first where I employed the use of Photoshop. I hope that you will find it difficult to see how I cloned, copied, and re-sized after painting the first half of this piece. Did I save time?

Hmmmmm. I think so, but the Photoshop process is time-consuming and involves drawing and design skills, too, so I don't want folks to think it was a cinch.

Here's a close-up of part of the piece.
©Illustration by Cheryl Kirk Noll

Hopefully, next week will YIELD a new piece for Illustration Friday.

Monday, March 5, 2012

Setting Up an Illustration Studio

I posted about setting up a studio for my students on the RISD-CE blog, Drawing Together, but I thought it might be of interest to those who read this blog as well. So here is a little advice, and some pix and links to working illustration studios.

My own workspace is in tight quarters... a sun room.


1. Create your own dedicated space.
When you need to clear your work off the dining room table before you can feed the family, you're wasting precious time. Get your own space... a place that's yours, and yours alone... even if it's a small desk tucked into a corner.
CE's children's book writing instructor, Marlo Garnsworthy, set up her own art space recently. It only takes a corner of one room, but is practical and inviting.    

Marlo's newly created workspace


Marlo's space hard at work!
2. Get good light.
Illustration comes from the Latin word that means "to light up." Follow that advice! 
Traditionally, north light is supposed to be best for artists, but I like any and all the natural light I can get. You also need at least one of those adjustable neck lights so you can pull it exactly to where you want. Fluorescent or incandescent can be debated for days... your choice. The fluorescent lights with a magnifying glass are great for those little details.
RISD CE-instructor Judith Moffatt has a wonderful studio. The L-shaped configuration of desk and worktable is an especially efficient set-up, and accommodates her computer as well. And check out the lighting!!! Heaven!
Judith Moffatt's well-lit workspace

3. Get comfortable.
If you're hunched over with no back support, you're going to have neck and back problems down the road. Get a chair with an adjustable seat and have place to rest your feet. Many artists prefer desks that can be tilted. Some folks use high desks, and stand instead of sitting.
Illustrator Don Tate works standing up, and shows us that messy can work, too!
link to Illustrator Don Tate's studio
Artists often suffer from repetitive motion injuries, too. Pay attention as you work to creeping aches and stiffness. Even with good seating, stand up and walk around at least every hour. Do a few stretches, gently roll your shoulders and neck, or stand with your back against the wall and do a few pelvic tilts. 


4. Have your tools handy.
Set up hooks for rulers, T-squares, etc. Use lazy-susans or other tabletop organizers. Office, art, and scrapbook supply stores offer many options. Mobile taborets are popular, although I've never gotten mine to function that usefully. Drawers, shelves, racks... you get the picture.


I love this double lazy-Susan from kitchen storage at Target.


Specialized containers can be useful.
 
5. Create adequate storage.
You need a place for materials that you only use occasionally, such as papers, reference books, specialized tools, and finished art. If your space is limited, you can put these in a separate room. My basement is dry, so it works well for storage, but attics and basements can be problematic because of heat, cold, damp and pests.
Deep, professional quality legal size file cabinets are useful, and flat files are fabulous, but they can cost an arm and a leg. I was fortunate to get many of my storage containers from used office supply stores for more reasonable prices. Cheap file cabinets aren't cost-effective if they stop opening when fully loaded, and I don't mind the few dings in my high-quality used file cabinets with overloaded drawers that roll with the push of a finger.

Flat files in my cool, dry basement.
 
Don't forget a place for the peripherals... close enough so they can get wired up properly. Printer, scanner, computer, back-up hard-drive. A place to do cutting is good too. And a self-healing mat.
Judith Moffatt's flat files, printers, and reference books.
Judith's studio. You can never have too much storage space, light and decorative touches (or purple). 
5. Create a place to display your work in process.
Ideally, you'll have a place to view reference materials, inspiration boards, sketches, etc while you're working. Try to have a bulletin board or open wall space nearby. If you checked out Don Tate's link above, you'll see that even the floor can work.  Pin or prop up your work, and stand back to view it from a distance from time to time.
For a few peeks at spaces to aspire to, here are some links.
Illustrator Susan Kathleen Hartung's studio tour. click here
Blog tour of the ultra charming studio of Jenny B. Harris, "illustrator, designer and generally artsy crafty person." click here
No matter how little space you have, you can make it work for you!